

One of the important aspects of building this addition was for us to re-use, recycle or use up what we had. This window is large. Something like 7'x5'. It was bought at an auction for $1. It is double pane and I had to replace both of the cranks on the side. Total cost about $12.  This is a look at the existing living room. It is about 15x15. Low celings. The picture is taken standing in the middle of the room looking towards the grainbin.
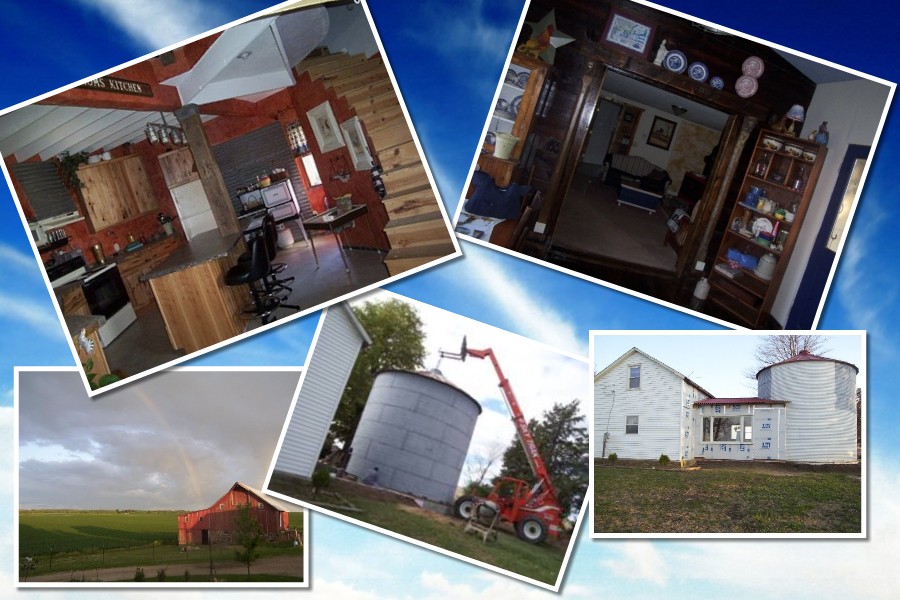
 The wood stove we removed this year. It's going out in the greenhouse/sunroom.
Installing flat windows in a round building was fun. This too is a recycled window.

In the corner of the foyer we built a closet for the coats and the dreaded (much hated) Kirby vacuum.

The island counter top was made the winter before we actually installed it. The counter sat outside all winter long before we tested it's "spot". Yep, it fits! Yea! Now all we need are cupboards for it to sit on.

Were you wondering what was under the steps? Ah, another recycled door and some fancy trim we dug out of the garage.

 This is a look at the existing living room. It is about 15x15. Low celings. The picture is taken standing in the middle of the room looking towards the grainbin.
 The wood stove we removed this year. It's going out in the greenhouse/sunroom.
Installing flat windows in a round building was fun. This too is a recycled window.

In the corner of the foyer we built a closet for the coats and the dreaded (much hated) Kirby vacuum.

The island counter top was made the winter before we actually installed it. The counter sat outside all winter long before we tested it's "spot". Yep, it fits! Yea! Now all we need are cupboards for it to sit on.

Were you wondering what was under the steps? Ah, another recycled door and some fancy trim we dug out of the garage.

Under the staircase is our walk in pantry. Each shelf was made out of oak from a restarant which closed. The oak was free.
 Yep, we painted the oak. Sorry :-(

The pantry looks empty here because this was just the extra food. We were not using the new kitchen at this point. Today all the shelves are full and the floor is covered with food too. I'll take another picture which will show you a 15 foot pantry is not long enough.

 Yep, we painted the oak. Sorry :-(
The pantry looks empty here because this was just the extra food. We were not using the new kitchen at this point. Today all the shelves are full and the floor is covered with food too. I'll take another picture which will show you a 15 foot pantry is not long enough.
 This drawing was "done" by my friend Brenda. This is our first step to creating a curved stairway.
 From Brenda's drawing I made this drawing. Figuring out how many steps I needed and how to make that curve was a task. The second floor as you will see is open around the staircase as well as there is a pie shaped piece missing. You will see those pictures later.
 Now, this may not be exactly how some master stair builders would have done things, but this is the way we did it.
  You can see the walls in the bin were studded out and then we built the outside portion of the steps.
 The outside row of steps came next. I can tell you there was much discussion here. Nothing was straight with the center of the bin, nothing was straight towards the outside row. But we still put it up. Hoping for the best in the end.
 Here we are, both sides of the steps built and in place. Never mind that nothing is exactly 16 inch centers. Grr....
 The first three steps are up. These three steps only took us one FULL night of pulling our hair out.


.jpg)


